

How to Install Golf Cart Lift Kit: Step-by-Step
Table of Contents
- What You'll Need: Golf Cart Lift Kit Installation Tools
- Safety Precautions and Jack Stand Setup
- Removing Front Suspension Components
- Installing the Lift Kit Assembly
- How Long to Install Golf Cart Lift Kit
- Golf Cart Lift Kit Alignment Tips and Post-Installation Adjustments
- Common Installation Mistakes to Avoid
- Frequently Asked Questions
Last Updated: September 27, 2026
What You'll Need: Golf Cart Lift Kit Installation Tools
Installing a golf cart lift kit requires specific tools and materials, improvising leads to frustration and safety risks.
Essential tools include a socket set (metric and standard), an impact wrench for stubborn fasteners, and a torque wrench to tighten bolts to manufacturer specifications, critical for suspension safety.
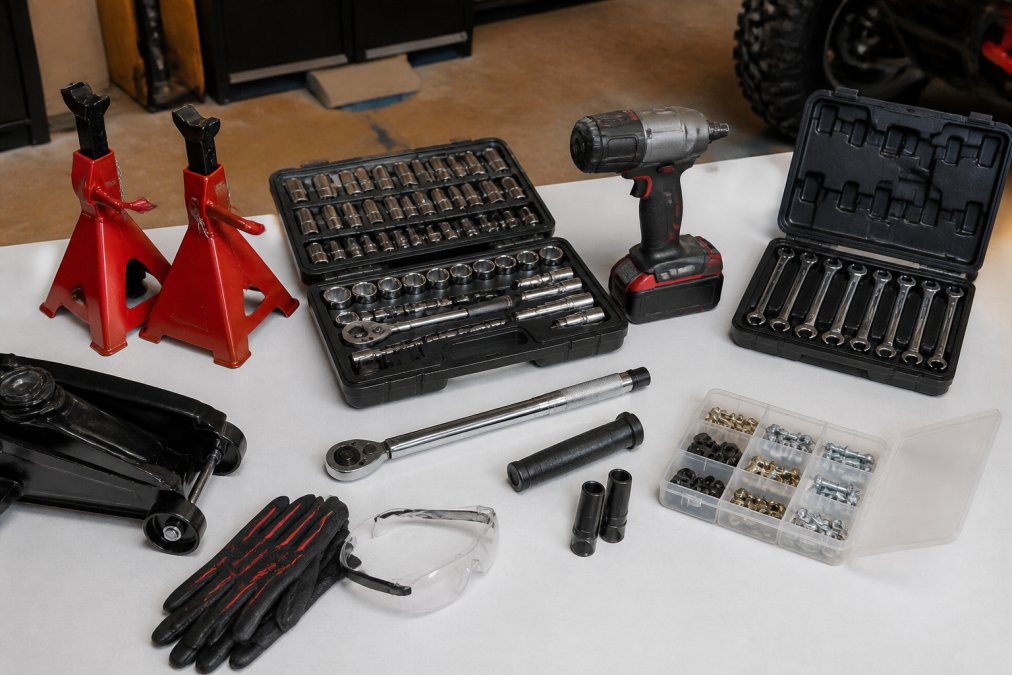
Beyond power tools, you need safety equipment and support gear:
- Jack stands (minimum two, rated for your cart's weight)
- Hydraulic floor jack
- Adjustable wrenches
- Ratchet straps
- Cotter pins and lock washers
- Heavy-duty work gloves
- Safety glasses
A grease gun and lithium grease are essential for maintaining new bushings after installation.
Safety Precautions and Jack Stand Setup
Safety is critical when working underneath a golf cart. Improper jack stand placement can cause serious injury.
Park on level ground, engage the parking brake, chock the wheels, and remove the ignition key to prevent accidental movement.
Position the hydraulic floor jack under the frame, not the body. Once raised, immediately place jack stands under the frame on both sides. Never work under a cart supported only by a hydraulic jack.
Raise the front end 12-18 inches, place jack stands securely, and double-check they're locked. Wear safety glasses and work gloves throughout.
Removing Front Suspension Components
Front suspension removal requires patience. Apply penetrating oil to connection points 15 minutes before attempting removal, especially on older carts.
Remove the wheels using an impact wrench to break loose lug nuts, then finish by hand to prevent over-tightening during reinstallation.
Remove cotter pins and castle nuts from the tie rod ends. Use a tie rod puller to separate joints, or tap the spindle arm with a rubber mallet if needed.
Remove the kingpin bolts holding the spindle assembly to the suspension arm using a socket set and breaker bar. Apply penetrating oil if they resist.
Disconnect the brake cable if applicable (consult your cart's documentation). Remove shock absorbers (two bolts each). Carefully lower the suspension arm using the hydraulic jack, supporting it with jack stands to prevent sudden drops.
Installing the Lift Kit Assembly
Inspect all lift kit components for damage before installation.
Install new bushings into the suspension arm mounting points, pressing firmly until fully seated. Loose bushings cause rattling and premature wear.
Position the lift kit assembly and align mounting holes. Start bolts by hand to ensure correct alignment. Use a torque wrench to tighten all bolts to specification, under-tightened bolts loosen from vibration, over-tightened bolts strip threads.
Reinstall upgraded shock absorbers and tighten to specification. Reconnect tie rod ends and kingpin assembly, tightening all fasteners and reinstalling cotter pins to prevent bolts from backing out.
How Long to Install Golf Cart Lift Kit
Most DIY installations take 4-6 hours; first-time installers need 6-8 hours. Stuck bolts add significant time. A helper speeds the process by holding components steady during tightening.
How Lift Kits Affect Battery Range and Motor Performance
A critical consideration many installers overlook: lift kits increase rolling resistance and change weight distribution, which directly impacts battery range and motor load on electric golf carts.
Larger tires (14-18 inches) increase rolling resistance, requiring more motor torque. Upgrading from 12-inch to 14-inch tires reduces range by 1-2 miles per charge on a 40-mile cart. On 36-volt systems, the impact is more pronounced.
A lift kit raises the center of gravity and shifts weight distribution, affecting traction and motor efficiency. Spindle lifts increase rear axle load slightly; drop axle lifts distribute weight more evenly but increase wind resistance.
Increased rolling resistance means the motor works harder on inclines. A cart that climbed a 10% grade easily may struggle after a lift kit. This is most noticeable on 36-volt systems.
Increased motor load shortens battery lifespan. Lead-acid batteries may drop from 5-7 years to 4-6 years after a lift kit. Lithium batteries are less affected.
To minimize range loss: choose 13-14 inch tires, maintain proper tire pressure, upgrade to lithium batteries for longer lifespan, and drive smoothly at moderate speeds.
Legal and Insurance Implications of Lift Kit Installation
Before installing a lift kit, verify the legal status in your jurisdiction. This is often overlooked but critically important.
Verify local height restrictions (typically 72-84 inches; lift kits add 4-8 inches), lighting requirements, suspension standards, and inspection requirements before installation.
Contact your insurance provider before installation. Notify them of the modification to avoid coverage exclusions or voidance. Premiums may increase 5-15% due to increased replacement cost and perceived risk.
Verify golf course policies and HOA regulations before installation. Many courses prohibit lifted carts or require approval; HOA violations can result in fines.
Before purchasing: check local vehicle codes, contact your insurance provider, verify golf course/HOA policies, and obtain written confirmation of coverage.
Golf Cart Lift Kit Alignment Tips and Post-Installation Adjustments
After installation, adjust your cart's alignment to prevent tire wear, pulling, and instability. Camber, caster, and toe-in must be verified and corrected.
A lift kit changes suspension arm angles relative to the frame, directly affecting wheel alignment. Understand these three critical angles:
Camber is the wheel tilt relative to vertical. Most golf carts run 0-2 degrees positive camber. After a lift kit, camber often increases; excessive positive camber (more than 3 degrees) causes outer tire wear.
Toe-in is the wheel angle relative to the cart's centerline. Most golf carts run 0-0.25 inches of toe-in. Excessive toe-in causes inner tire wear and pulling; toe-out causes outer wear and wandering steering.
Caster is the steering axis tilt. Golf carts typically have 2-4 degrees of positive caster. Caster is rarely adjustable but understanding it helps diagnose handling issues.
Measure alignment using these DIY methods:
Measure the distance between tire inside edges at the front and rear of the wheels. The rear should be 0.125-0.25 inches greater than the front. Repeat three times and average.
Use a digital level on the wheel rim. Both wheels should show similar angles (within 0.5 degrees). Camber differences over 1 degree cause pulling.
Drive at 10 mph with hands off the wheel on a flat parking lot (if safe and legal). Drift over 3 feet indicates alignment issues.
Loosen jam nuts on tie rods and rotate to adjust toe-in. One full rotation changes toe-in by 0.125 inches. Adjust both sides equally. Re-measure after each adjustment and tighten jam nuts when correct.
Addressing Camber Issues
Camber is typically not adjustable on standard golf cart suspensions without custom shims or bent-arm replacement. However, if you observe uneven camber after installation:
- Verify that all suspension bolts are tightened to specification. Loose bolts allow the suspension arm to shift, changing camber.
- Check that bushings are seated fully and evenly. A bushing that is partially installed or cocked to one side changes the suspension arm angle.
- Inspect the suspension arm itself for bending. A bent arm cannot be corrected by adjustment; it must be replaced.
- Confirm that the lift kit components were installed symmetrically on both sides. Mismatched installation heights cause camber differences.
If camber remains uneven after these checks, the suspension arm may be damaged or the lift kit may not be compatible with your cart model. Consult the lift kit manufacturer's technical support.
Monitoring Tire Wear Patterns
Tire wear tells the story of alignment accuracy. After installation, inspect tires weekly for the first month:
- Even wear across the tire width: Alignment is correct.
- Wear on the outer edge only: Excessive positive camber or under-inflation. Reduce camber if adjustable, or increase tire pressure by 2 psi.
- Wear on the inner edge only: Toe-out or negative camber. Increase toe-in by rotating the tie rods.
- Wear on one side of the cart only: Uneven camber between left and right wheels. Verify both suspension arms are installed identically.
- Center wear with outer edges untouched: Over-inflation. Reduce tire pressure by 2 psi.
- Scalloped or cupped wear pattern (dips around the tire circumference): Suspension bounce or worn shock absorbers. Verify shocks are tightened to specification and functioning correctly.
Final Verification and Test Drive
- Drive in a straight line on flat ground at 15 mph. The cart should not pull left or right.
- Make gentle turns at low speed. Steering should feel responsive and centered.
- Drive over a small bump or pothole at 10 mph. The suspension should absorb the impact smoothly without bouncing excessively.
- Check that the steering wheel returns to center after a turn without binding or resistance.
- Listen for clunking or rattling sounds, which indicate loose suspension components.
Tire Pressure Adjustment
Common Installation Mistakes to Avoid
Rushing through torque specification application is the most common error. Bolts that aren't tightened to specification loosen from vibration. Loose suspension bolts create dangerous handling and can cause complete suspension failure. Use your torque wrench on every critical fastener.
Frequently Asked Questions
How long does it actually take to install a golf cart lift kit?
Installation typically takes 3-6 hours for most DIY installers, depending on your experience level and the specific lift kit type. Drop axle kits are generally faster (3-4 hours), while A-arm systems may take longer. Having all tools ready and following a methodical approach keeps you at the lower end of this range. First-time installers should budget extra time for learning the process.
Do I need special tools to install a golf cart lift kit?
Yes, several specialized tools make the job much easier and safer. Essential items include a socket set, impact wrench, jack stands, torque wrench, and safety gear. A floor jack helps with lifting, and a grease gun is useful for bushing maintenance. While you might complete installation without some tools, having the proper equipment reduces installation time significantly and ensures accurate torque specifications on all hardware.
Do I need an alignment after installing a golf cart lift kit?
Yes, alignment is essential after lift kit installation. The increased ground clearance and suspension geometry changes affect toe-in and camber angles, which impact handling and tire wear. Professional alignment ensures your cart tracks straight, reduces pulling to one side, and maximizes tire lifespan. Many DIYers skip this step but regret it once they notice steering issues or uneven tire wear.
What's the difference between a drop axle and an A-arm lift kit?
A drop axle kit lowers the axle housing while keeping the frame at the original height, providing 4-6 inches of lift with a simpler bolt-on installation. A-arm kits replace the entire front suspension system, offering 6-8 inches of lift and better handling characteristics. Drop axle systems are generally easier to install and more affordable, while A-arm kits provide superior suspension travel and ride quality but require more technical expertise.